Showing posts with label *beauty tips. Show all posts

Friday, 16 March 2018

10 fruits and vegetables that will add glow to your skin - Beauty tips

10 fruits and vegetables that will add glow to your skin


Representational imageRepresentational i
AAmla
Eat amla on an empty stomach first thing in the morning. Rich in Vitamin A, amla helps in keeping the skin tight and adds a sparkling glow.

Apple


Apples are rich in Vitamin C and help in maintaining the firmness of your skin and prevent it from undergoing any radical damage. Either eat one apple a day or drink its juice.


Beetroot

Beetroots are a source of anthocyanins, which are powerful antioxidants that work against wrinkles. You could boil the beetroot and add a few drops of lemon juice to it. After regular consumption, your cheeks are bound to look glow!

Carrot


Carrot have beta carotene, which our bodies convert into Vitamin A. They fight signs of aging like wrinkles.

Lemon

Lemon fights acne, scars and blackheads. Squeeze lemon juice in lukewarm water and drink it first thing in the morning.
Pumpkin seeds
Pumpkin seeds have zinc in them, which is great for production of new cells. They enhance your complexion. Munching on them will yield great results.

Spinach

Rich in anti-oxidants, spinach strengthens our skin tissues and flushes out toxins, making our skin look clearer!

Strawberry

Strawberries are skin-lightening agents. Loaded with anti-oxidants and malic acid, strawberries help you get a natural glow. Make a smoothie out of strawberries or add a dash of mashed strawberries to yogurt and honey, apply it on your face and leave it for fifteen minutes. 
Sweet potato
Sweet potatoes are anti-inflammatory and have Vitamin A and Vitamin C. Boiled sweet potatoes with a tinge of salt, pepper and lemon juice serve as an ideal evening snack. 


Tomato
Tomatoes are acidic in nature and help tighten pores and fight pimples and sudden breakouts. Lycopene, an anti-oxidant that has anti-aging properties, acts as a natural sunscreen and prevents the skin from sagging.

Friday, 8 September 2017

How to apply make up for teen girls

How to apply make up for teen girls


Being a teenager is a fun time in any girl's life, but it can come with stresses, too. What kind of makeup should I wear? How do I apply mascara? Foundation or powder? Hopefully with a few helpful tips, you can learn to apply makeup and leave the stress for more important things, like school.


1. Prepping Your Face


Image titled Apply Makeup (for Teen Girls) Step 1
1
Consult a makeup expert. Figuring out the perfect makeup for your face, hair, eye, and skin tone can be confusing. Before you buy any makeup, visit a makeup expert. They can give you a makeup lesson on how to apply makeup, explain what colors are right for you, and answer general questions. You can find makeup experts at department stores, makeup stores, and spas.


Image titled Apply Makeup (for Teen Girls) Step 2

  2.  Wash your face. Adolescence is the perfect time to adopt a good skin care regimen. This is the time when breakouts are most likely to occur. Taking care of your skin can help prevent unwanted blemishes and acne. Skin care is also pivotal when wearing makeup. You always want to start the makeup application process by washing your face.
  • Determine what kind of skin you have. Do you have oily, dry, or combination skin? This indicates the kind of face wash you should buy.
  • If you have dry skin, use a mild cleanser. Cream cleansers are good for dry skin.
  • If you have oily skin, try a cleanser with salicylic acid or other acne fighting ingredients.[1]


 3 Apply moisturizer. After washing your face, apply a light moisturizer. This hydrates the face and prepares it for your makeup application. Moisturizer is important as you age to prevent early signs of aging.
  • For girls with dry skin, go for a more intense moisturizer, like one with glycerine. For girls with oily skin, choose a light, oil-free moisturizer.[2] Moisturizers with rice proteins can help absorb oil.
  • Make sure to apply SPF product every day, too. The sun is one of your skin's worst enemies. Sun damage can lead to wrinkles, damaged skin, or even skin cancer. After applying your moisturizer, dab on some SPF made specifically for your face. Try a tinted moisturizer with SPF added so you can do two things with one product!

Image titled Apply Makeup (for Teen Girls) Step 4
4
Apply concealer. Concealer is your best friend when you have breakouts or blemishes. Concealer is a product that helps cover and camouflage dark circles and blemishes on the face. Choose a concealer that matches your skin tone. Dab the concealer on the red spot; make sure not to wipe. That will take the concealer off. Blend gently with your finger. Brush some loose powder over the spot to set it.
  • Make sure to set concealer with powder that is one shade lighter than your skin. When it touches the concealer, it will darken.[3]
  • Don't choose a concealer stick that is too white, pinky, or ashy. Try to match it as closely to your skin tone as possible.[4]
  • Concealer can also be used under your eyes if you happen to have any dark circles or need lightening. Use a yellow-based concealer to lighten under the eyes.

Image titled Apply Makeup (for Teen Girls) Step 5
5
Consider skipping the foundation. Foundation is used to create an even skin tone. Teenaged girls don't need foundation; at this age, you already have beautiful skin. Most makeup experts suggest that during your teen years, less is more.[5] Concealer is probably all you'll need at this age. Foundations can be heavy, making you look dirty, cakey, and much older. You want to look natural and highlight your natural beauty.
  • If you have oily skin and want to wear foundation, choose an oil-free foundation that has therapeutic qualities for your oily face. You can buy these foundations at the store, or go to a doctor to get medical foundations.
  • If you want to wear foundation, go light and natural. The foundation should match the skin color of your neck.
  • Squeeze a nickle-sized amount of foundation into the palm of your hand. Use a foundation brush to draw the foundation on your face like a six-point star starting from your nose. Draw a line from the nose to the forehead, nose to your left and right cheek, nose to your left and right jaw, and nose to your chin. Then, use a sponge to blend the foundation into your skin. Lastly, use the brush to spread and blend the little bit of remaining foundation onto your neck.[6]
  • Foundation brushes are larger than blush, concealer, or powder brushes. Foundation brushes and sponges can be bought at most major retailers.
Image titled Apply Makeup (for Teen Girls) Step 6
6
Use powder only if you have oily skin. Like foundation, powder isn't necessary for young skin. It just covers up your natural glow. In addition to using powder to cover up your concealer on blemishes or under your eyes, you can add a little powder to your T-zone - your forehead, nose, and chin. This is the spot that is most likely to get oily through the day. Apply pressed or loose powder with a foundation or powder brush over your T-zone. It will help absorb the oil, but not cover up your natural glow.
  • Never use the same brush for multiple makeup types. If you used a foundation brush with foundation, don't use the same brush to spread powder on your face. Always use separate brushes.
Image titled Apply Makeup (for Teen Girls) Step 7
7
Try to stick to a Five Minute Face rule. Sticking to this rule gives you plenty of time to apply the makeup you need without going overboard.[7] To give yourself a Five Minute Face, limit your makeup time to five minutes in the morning. Don't rush; limit what you put on to what is essential: concealer, mascara, blush, and lip gloss. If it takes you longer than five minutes to apply your makeup, odds are you're applying too much.
  • Embrace your natural beauty. Keep in mind that makeup is supposed to enhance your beauty, not cover it up. Don't think that tons of foundation and powder is how you should wear your makeup. That might be true as you age, but at this age, enjoy your natural glowing skin.
Part 2  Applying Makeup to Eyes, Lips, and Cheeks
1
Comb your eyebrows. Using a brow brush, clean mascara brush, or toothbrush, comb your eyebrows up and over. Don't comb your eyebrows inward. This keeps them looking neat and growing the correct way.
  • Don't over pluck your eyebrows. Many teen girls thin their eyebrows too much. All you need to do is keep them neat and brushed.
Image titled Apply Makeup (for Teen Girls) Step 9
2
Apply eyeliner. Eyeliner is used around the lids of the eyes to define the eyes. A bit of eyeliner is an option for your look. Less is more works for eyeliner application - too much eyeliner can give you raccoon eyes or make you look dirty. Go for brown or light grays or even purple. Wear black on special occasions or the weekend when you want to look extra special.
  • Apply the liner on the lower lash line and smudge with a cotton swab. Apply it to the top lid, keeping close to the lash line. Smudge with a cotton swab.
  • Black eyeliner is not for everybody. It can make your eyes look smaller. The smaller your eyes, the lighter your liner should be.
3
Brush on mascara. Mascara is used to define the eyes by thickening, lengthening, and darkening the lashes. The only two things you probably need as a teen girl is mascara and lip gloss. Using a brown mascara, place the brush at the roots of your top, outer lashes. Wiggle the brush outwards, coating the lashes with mascara. Do the same to the inner lashes and the bottom lashes.
  • Be careful of clumping mascara. Wiggling the brush can help your lashes not to clump. You can also brush your lashes with an eyelash comb to try to prevent clumps. Don't over apply - too much mascara can cause clumps.
  • Blue eyes look good with dark brown mascara, while dark eyes look good with darker mascara.
  • Not everyone should wear black. Decide which shade of brown or black enhances your eyes while still making you natural. You want to save shocking, intense eyes for special occasions.
4
Apply your eyeshadow. Select a natural, shimmery shade for your everyday look. Apply the eyeshadow with an eyeshadow brush to your lower lids. Don't go all the way up to the brow line.
  • If you have brown and hazel eyes, wear warm colors like copper and gold. If you have brown and green eyes, try gray or plum.[8]
  • You can also have fun with crazy colors, like blue. Just remember that these are generally not everyday colors, but for special occasions.
5
Brush on some blush. Go for a natural look when wearing blush. You just want to give your cheeks a touch of color. Never wear extremely dark blush colors. Instead, go for bronzers or pink rosy colors.
  • To apply the blush, smile to find the apples of your cheeks (the round parts). Brush a light amount on your apple, then your nose, forehead, and chin.
Image titled Apply Makeup (for Teen Girls) Step 13
6
Swipe on your lip gloss. Lip gloss gives you a natural color while adding shimmer. If you want a bit of color, try a lip tint. Go for soft pinks or tans. Avoid dark colors; they will give you a hard, old look.

Part 3 Removing your make up

1
Remove your makeup at night. Never sleep in makeup. Sleeping in makeup causes blemishes, rashes, and can cause early aging. Buy an oil-free makeup remover to remove your makeup at night. Soak a cotton ball in the remover and wipe it over your face to get all the day's product.
  • Makeup remover is important to help prevent clogged pores and rashes. It is specifically designed to remove makeup and makeup residue, which your cleanser isn't. Always use makeup remover before you wash your face. Use a formula for face makeup, and a separate special formula for your eyes geared towards removing mascara and liner.[9]
2
Wash and moisturize your face at night. After removing your makeup, wash it with a cleanser. This removes any dirt, oil, and impurities your face has acquired throughout the day. You can use the same cleanser as you did that morning. Also moisturize your face to keep it hydrated.
  • Only wash your face twice a day. Overwashing your face can cause breakouts and break down vital skin cells.[10]
3
Exfoliate your face twice a week. Makeup can lead to clogged pores even if you wash regularly. Purchase an exfoliating scrub containing benzoyl peroxide, which will help you remove any leftover impurities that can cause acne or blemishes.


Wednesday, 15 June 2016

Beauty tips for Eyebrows

  1. Beauty Tips For Eyebrows
  2. Your eyebrows add strength and definition to your face. Well groomed eyebrows enhance your beauty
  3. You should pluck eyebrows before bedtime so any redness will disappear overnight. In shaping your eyebrows use your facial features.
  4. Use a pair of slant edge tweezers which grip hairs easily. Comb hairs one way and then the other to remove loose hairs.
  5. You should pluck hairs between the brows and any stragglers. Never remove the hairs from above your eyebrows.
  6. Pluck each hair individually close to the root. Work in the direction of the growth.
  7. Always avoid over plucking. In defining your eyebrows choose a shade similar to your natural hair colour.
  8. When using a pencil you should apply in small, feathered strokes. Starting at the inner corner work outwards.
    Blend the colour with a brush. To tame stray hairs just use hair gel and comb through to neaten.

Sunday, 13 March 2016

Do it yourself French manicure

Do it your self French manicure -  Their pale pink base and bright white tips characterize the ever-popular French manicures, which are a common request at nail salons everywhere. Professional nail stylists may paint your nails alone or they may apply fake tips if you desire. Based on your personal preferences, a nail designer will give your nails a strengthening and conditioning workout prior to painting them. If you get your nails done with fake tips, you may have to make a trip back to the salon to get your French tips �refilled� when your nails have grown noticeably. Keeping longer, healthy nails will be most conducive to sporting a French manicure. To complete your own French manicure, begin with the following steps to prepare your nails for the procedure.
  • Using a cotton ball soaked in nail polish remover, wipe off any old nail polish prior to painting nails. Wash hands and soak in warm water for a few moments.
  • With an orangewood stick, gently push back the cuticles so they are all even with each other once the water has softened your skin.
  • With nail clippers, beauty scissors or a nail file, shape your nails evenly.
  • With a steady hand, carefully paint only the tip of each nail with a white hue. A second coat may be desirable, depending on the thickness and opaqueness of the polish. Allow polish to dry between coats.
  • Using a slightly transparent pink or nude color, paint the entire nail once the tips have dried. A second coat may be necessary. Allow nails to dry thoroughly.
  • Once all the coats have dried, apply a clear topcoat to protect your new French manicure. To lengthen the manicure�s lifespan, make an effort to paint a clear coat on each night. Be sure it has ample time to dry completely.
  • If you are feeling especially creative and ambitious, kick off your shoes and match your tootsies to your fingertips!
This procedure is best performed on a lazy morning or evening when no other pressing errands or tasks will get in the way. After painting your nails, avoid doing things with your hands while they dry. For an easier painting technique, check the beauty section of a drug store or superstore for a French manicure kit. The set should contain, at the very least, nail polish in white and pink or beige and a clear topcoat. Some manicure sets - like COVERGIRL�s French Manicure Kit � will contain tiny, sticky nail guides. These make the manicure process 100 times easier by allowing you to place the guides on each nail individually, leaving a small margin where the polish can spill outside the tip without tainting the rest of the nail. As the holidays approach, let your crazy side out by concocting a wildly modified French manicure - green and white for St. Patrick�s Day, pastel shades for Easter, black and orange for Halloween and red and green for Christmas. Have fun and remember, even if you find the do-it-yourself French manicure difficult at first, practice will provide you with the skills you need to create beautiful and perfect manicures all year long!

Natural nails - beauty tips


Our hands are such an integral part of our daily lives, and constantly, we risk their health and strength, often without even noticing, because of the hustle and bustle of our day-to-day activities. Take a few moments each day, or at least a few times a week, to monitor the condition of your nails � the color, the texture, the appearance of ridges or white marks. Make a greater effort to take good care of your nails, and you will be thrilled with the way they complement your wardrobe and your own personal style. Consider the following tips as a way to enhance the health and quality of your nails.

Great, Healthy Nails

    Apply speed-dry nail polish when time is of the essence. Drink lots of water. Keep your body hydrated everyday to maintain healthy nails. Fortify your diet with FDA approved vitamins or supplements. Your fingernails count on you to be responsible with your health and your diet. Unless instructed otherwise by your physician, increase your daily doses of Vitamin A, Vitamin C, calcium, folic acid, protein, Vitamin B12, and zinc. Touch up your manicure on a daily basis to prevent chips and cracks. Your nails depend on you to maintain a healthy diet. Take in lots.

Nail polish tips:

    Finish with a clear topcoat to add gloss and sheen. Start with a base coat to strengthen and protect the nails. Store nail polish in the refrigerator to maintain a smooth consistency. Try not to store nail polish in a room that becomes cold. The nail polish bottles may break without warning, leaving you with a big mess.

To avoid breaking nails or brittle nails:

    Avoid using your nails as tools. This means no picking, scratching, digging, pinching, etc. You know who you are! Increase the amount of calcium in your diet. Use products containing alcohol, especially perfumed lotions, sparingly. These items can make nails prone to breaking. Wear rubber gloves when you do chores that involve continual submersion in water or contact with harsh detergents or chemicals.

Friday, 29 January 2016

50 Fairness tips

50 fairness tips:

How to get fair skin naturally at home by home remedies

1. Scrub a half of lemon on your face daily to lighten your skin tone. Lemon is an excellent bleaching agent, and it is very helpful in ironing out the blemishes of the face. Try this home remedy for getting fair skin at home.

2. Squeeze a juice of potato in a bowl, and apply this on your skin to bleach your face. Your skin's will get fair gradually after using this home remedy .

3. Use tomato mashed tomato pulp on your skin to give a pinkish glow to your skin. Tomato is very good for giving you fair skin tone . Home remedy of tomato also absorbs excess oil of your face to treat open pores of your face.

4. Home remedy of lemon juice and honey in equal quantity and apply on the skin to get fair skin.

5. Take half teaspoon of honey with a pinch of cinnamon; apply on your face to get fair skin at home.

6. Apply cucumber juice with lemon juice to lighten your skin. This home remedy is very useful for making oily skin fair.

7. Apply plain curd on your skin to get fair and soft skin. Curd is a good source of zinc and lactic acid, both aid in lightening the skin tone.Curd is an excellent home remedy for getting fair skin.

8. Apply coconut water to get fair and flawless skin at home . This home remedy is helpful in lightening the scar of chicken pox also.

9. Massage your skin with almond oil or olive oil to get fair and soft skin, you can add a pinch of saffron to get better results. You can use this home remedy for your small babies at home also.

10. Mix 1 spoon of milk powder, 1 spoon of lemon juice and 1 spoon of almond oil. Apply this concoction on your skin; leave it on for 15 minutes before washing off. This is an effective skin lightening mask. This home remedy gives excellent results in getting fair skin at home.

11. Home remedy of Cucumber juice mixed with honey is very useful for making dry skin fairer.

12. Apply egg white on face twice a week to get fairer skin. Use this home remedy if you have to make your oily skin fair at home.

13. Mix oatmeal, curd with tomato to make a face pack for getting fair skin at home.

14. Mash a tomato and pour 4-5 drops of lemon juice, and apply this home remedy on your skin to get fair skin.

15. Mix papaya, honey, milk and milk power, and apply this home remedy on your skin to get fairer face instantly. This remedy is good for oily skin.

16. Apply sandalwood paste mixed with almond oil to get fair skin. This home remedy is a good home facial for getting fair skin at home.

17. Soak up almonds in the raw milk overnight, and grind it to apply on your skin. It is an excellent home remedy in giving you fairer skin tone.

18. Using raw milk on your skin lightens your skin tone. You can use this remedy on your babies also to get fair skin.

19. Clean your face with raw milk in which a pinch of saffron is added. Use this home remedy with cotton pads daily to get fairer and clearer skin at home daily.

20. Use home remedy of fuller's earth (multani mitti) with sandal wood paste to get fair and glowing skin at home.

21. Take 2 table spoon gram flour(besan) , 1 spoon of raw milk, 6 drops of lime juice with few drops of olive oil to make face pack to get fair skin. This home remedy is good for all skin types.

22. Boil cumin seeds in water, and rinse your face with this water to reveal fair and radiant skin. Use this home remedy for getting fair and radiant skin at home.

23. Apply lentil (masoor daal) with milk or curd. This home remedy is very good face pack for getting fair face ,and body. Use it daily to get results in 15 days.

24. Grind the dried orange peel and mix it with milk or curd to l get fair skin tone.

25. Boil radish in the water and apply this water on the face to get fair skin at home.

26. Soak black gram (urad) with 4 almonds in the raw milk and grind it in the morning. Apply this pack on your skin to get excellent results to lighten your skin in few days if used daily. This home remedy is excellent in getting fair skin at home.

27. Mix 2 spoon of mint juice with half spoon of lemon juice.Use this home remedy on your skin to get fairer skin; this pack knocks out the whiteheads as well as exfoliates the skin.

28. Apply the juice of ripe pineapple to get fair skin naturally at home.

29. Mix cucumber pulp (grated) with curd to apply on your skin, and see your skin gets fairer in few days.Try this home remedy for sure.

30. Home remedy of Fuller's earth (multani mitti) mixed with rose water to make it skin lightener for oily skin.

31. Mix watermelon with papaya to get makes a fairness face pack to get fair skin at home for oily skin.

32. Grind chirongi (sunflower seeds) which has been soaked up in milk overnight with few strands of saffron to get fairer skin. This remedy is best for very dark skinned people. Use this remedy to daily to make even dusky complexion lighter. It will take time to improve your complexion if you have dark skin, but it will work surely. So, have patience. You can trust this home remedy if if have really dusky tone, it will help you in getting fair skin at home in few months or years.

33. Apply turmeric with honey and lemon to get fairer skin. Do not use this if have dark skin.

34. You can use this excellent home remedy of liquorice with honey to get fair skin.

35. Mix 1 egg yolk, 1 spoon of curd, 1 spoon of fuller's earth, 1 spoon of honey to make a face pack to make your skin fair as well as tightening the skin.This home remedy is helpful in getting fair skin at home.

36. Take 2 spoon of sugar with juice of a lemon to scrub your face. Scrub your face till sugar granules do not melt . Use it on your face, neck, elbows, legs to get fairer and softer skin. Do not do this if you have pimples on your face as pimples will burst in the process of scrubbing. This home remedy is helpful in getting you fair and smooth skin.

37. Use home remedy of lentil with rice after grinding to make it a skin lightening scrub for your face.

38. Home remedy made by Mixing turmeric, cream (malai) and gram flour to exfoliate your face on the alternate day to get fairer skin. Exercise caution while using turmeric, as it will give yellowish tinge to your face.

39. Spray rose water on the skin to get fair skin.

40. Breadcrumbs with cream (malai), when applied daily make you fair.

41. Face pack of saffron with cream( malai )makes you fair.

42. Malai with besan(gram flour) is the best for dry skin, this home remedy will help you in getting you fair skin.

43. Malai with curd works well in making you fairer. Try this home remedy to get creamy and fair skin at home.

44. Home remedy of Curd with honey is a skin lightener. Use this home remedy for 15 days to get fairer skin like never before.

45. Home remedy of Curd with lemon works good for giving you fair and silky skin.

46. Curd with tomato will give you excellent result, if you use it before bedtime daily. Try this home remedy for getting fair skin at home.

47. Coconut oil is helpful in giving you light skin.

48. Milk and chapatti (bread) is very good fairness facial mask at home. Mash bread (chapatti) in milk to make a paste to apply, see results in just 15 minutes after washing off. this home remedy helps you in getting you fair skin at home.

49. Home remedy of Milk powder with honey makes your skin light and eases out fine lines of dry skin.

50. Home remedy of Milk with honey will help in getting you fairer if you use it daily.

Tuesday, 19 January 2016

Beauty tips for hair

10 simple beauty tips for hair


Long, thick and lustrous hair is high on every woman’s wishlist. But everyday exposure to dust, pollution, sun and dirt makes it an almost impossible dream to achieve. Products available in the market contain chemicals which do more harm than good in the long run. So how do you combat all these problems while still keeping hair healthy and strong?

Easy Homemade Beauty Tips For Hair To Follow:

1. General Health: Diet

diet food
Diet plays a very important part in the overall health of our hair just like skin. Here are a few additions to your diet as per your hair type that will help you add some glory to your crowning glory.

  •  Normal Hair: Fish, chicken, dals, sprouts.
  •  Dry Hair: Raw vegetables, pulses, brown rice, bananas, nuts, vitamin E capsules.
  •  Oily Hair: Green leafy vegetables, salads, fresh fruits, yogurt.

2. Shampoo: Mild shampoo


The most important of steps to keeping your hair healthy is keeping it clean. And the product you choose needs to be right for you. Always keep them mild.

  • For dry hair: Choose one doesn’t further strip your hair of its natural oils.
  • For Oily hair: Choose one that works on limiting the activity of your oily scalp
Do use a clarifying shampoo every once in awhile or the product build up will effect the results that you shampoo has. Ladies, please remember that the shampoo is meant to clean your scalp and not condition your hair so aver doing the shampoo for dry hair is not going to help you in anyway. If anything it will only cause harm in the long run. Use only a drop the size of a coin for one wash, it is more than sufficient.

3. The best conditioners: Egg

egg best conditioners
Eggs work wonders on your hair. The yolk is rich in fat and proteins which greatly acts in moisturizing while the white helps to remove unwanted oils.Use egg to condition normal hair, egg yolks for dry hair and whites for oily hair. Remember to rinse with lukewarm water only !!!

4. Cleansing away the itchy scalp: Lemon juice and olive oil

olive oil for skin
An itchy scalp can be a result of poor diet, stress or climate. Treat it with a mixture of 2 tbsp fresh lemon juice, olive oil and water.

  • Massage your scalp with this mixture and allow it to rest for 20 minutes.
  • Wash off as usual.
The lemon juice helps remove dry flakes of skin while the olive oil moisturizes the scalp. 

5. Damaged hair: Honey and Olive oil

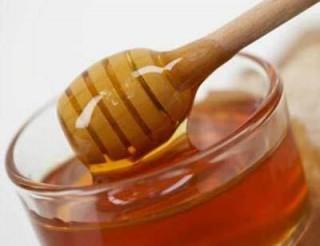
Honey and Lemon
Sun’s rays can be really harmful for your hair and can damage it badly. To get rid of this problem, try honey and olive oil.

  • Massage 1/2 cup honey and 2 tbsp olive oil into clean damp hair
  • Rinse off after 20 minutes.
Olive oil conditions while honey has both anti-bacterial and conditioning properties.

6. Volume boosters: Beer and Egg

Volume boosters
To add body to limp or flat hair, this is the perfect remedy.

  • Mix 1/2 cup flat beer, 1tsp oil and 1 egg
  • Leave on for 15 minutes.
  • Rinse with tempid water.

7. Frizzy hair: Avacoda

Avocado on frizzy hair
Treat frizzy hair by massaging a mashed avocado into hair.


8. Dandruff: Brown Sugar

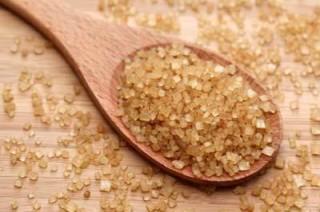
Brown sugar for Dandruff

One of the most common hair problems is dandruff.
  • Treat it effectively at home by mixing 2 parts of brown sugar to 1 part of your hair conditioner and lightly rub it on your scalp.
  • Rinse off thoroughly.

9. Hair fall: Aloe Vera


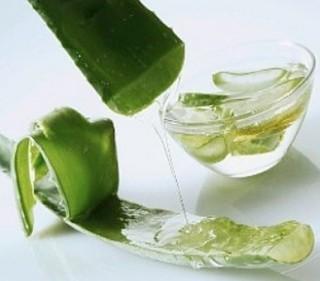
Hair fall is an ever existent problem in out lives. And it constantly captures our attention! We are unable to think of anything. Aleo Vera is a perfect for healing the scalp and bringing the pH balance to normal. It also has cleansing properties that cleans the pores out.
  • Blend aloe vera gel with 1/2 tsp. lemon juice
  • Add 2tbsp. coconut oil.
  • Mix it and apply on your scalp and hair.
  • Wash your hair as usual after 20 min.

10. Graying hair: Hair Color

Gray hair is never welcome. Even as a remainder of age! Even more when it comes earlier in life. Hair colors in the market are always there but have you considered that a more natural choice would be better for your hair?

Henna has been used a coloring agent for centuries now and when mixed with Indigo the results are only better. Here is how you can do it yourself.
  • Mix henna and Indigo. Allow it to sit over night.

For brown hair

  • Mix Indigo in warm water and leave it for 15 mins.
  • Mix the above two pastes.
  • Apply to hair and leave it on for an hour wrapped in a shower cap.
  • Rinse well and shampoo

For black hair

  • Mix Indigo in warm water and allow it to sit for 15 mins.
  • Apply Henna paste on hair for 25 mins and wash off.
  • Add salt to the Indigo paste and apply to hair.
  • Leave it on for 2 hours wrapped in a shower cap.
  • Rinse after.
I hope these tips help you all in getting and maintaining your hair,so it can be the healthiest hair you can have. Also remember, it’s important to hydrate from the inside out so make sure you drink lots of water and eat plenty of fruits and vegetables as it really does make your hair  look more healthier and lustrous.
 

Palko ko maine - Shikha

Palko ko maine dhire se uthaya or dekha teri or, Janna chahti thi kya kahe rahe hai tere ye naina. Kaise ek pal mai  naina tere ...